
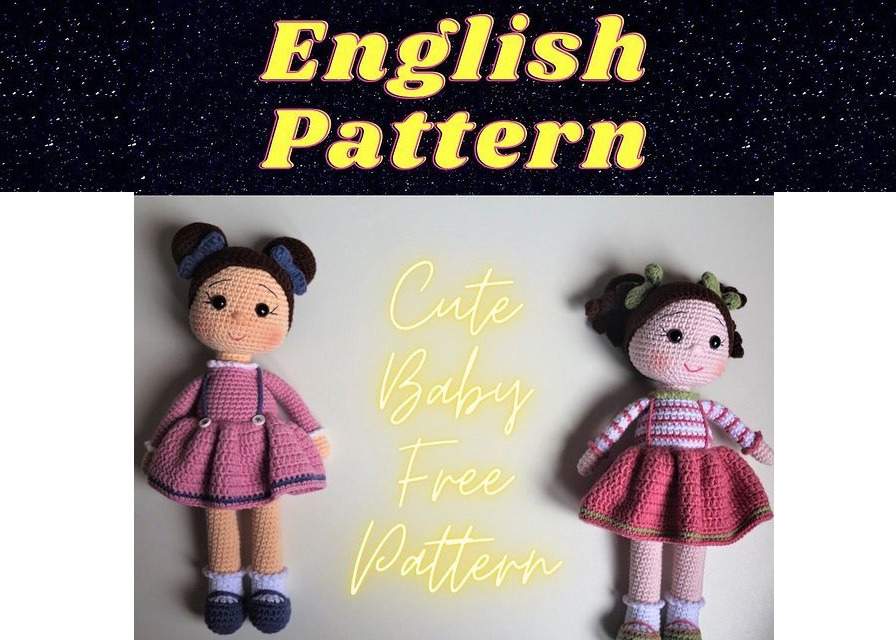
DIY Amigurumi Cute Baby Making
Introduction: Amigurumi is a popular craft that involves making cute stuffed toys using crochet techniques. In this lesson, we will tell you how to make an amigurumi doll figurine. Follow these steps to create a charming keepsake or heartfelt gift for someone you love.
DIY Amigurumi Cute Baby Making
Desing: sirince_bebek
Introduction: Amigurumi is a popular craft that involves making cute stuffed toys using crochet techniques. In this lesson, we will tell you how to make an amigurumi doll figurine. Follow these steps to create a charming keepsake or heartfelt gift for someone you love.
Materials Needed:
- Worsted weight yarn in skin tone and desired clothing colors.
- Crochet hook appropriate for the yarn (usually around 3.5mm to 4.5mm).
- Fiberfill stuffing.
- Safety eyes or embroidery thread.
- Yarn needle.
- Stitch markers.
- Scissors.
Step 1: Creating the Body
- Begin with the skin tone yarn.
- Start with a magic ring and single crochet 6 stitches into the ring. Pull the ring tight and place a stitch marker in the last stitch.
- In the next round, increase in each stitch by working 2 single crochets into each stitch (12 stitches).
- Continue to increase gradually in each round until you have a round piece that serves as the baby’s body. Remember to stuff the body firmly with fiberfill as you go.
- To create the legs, start with the first color for the pants. Chain 5, skip the first chain, and single crochet into the next 4 stitches. Turn and single crochet in each stitch for about 12 rows. Repeat for the other leg.
- Attach the legs to the bottom of the body using slip stitches.
Step 2: Forming the Head
- Switch back to the skin tone yarn.
- Create a magic ring and single crochet 6 stitches into the ring.
- Increase in each stitch for the next round (12 stitches).
- Continue to increase gradually in each round while stuffing the head.
- Attach safety eyes between rounds, or embroider the eyes using black yarn or thread.
- Embroider the mouth and other facial details using embroidery thread.
Step 3: Crafting the Arms
- With skin tone yarn, create a magic ring and single crochet 6 stitches into the ring.
- Increase in each stitch for the next round (12 stitches).
- Continue to increase gradually in each round while stuffing the arms.
- Attach the arms to the sides of the body.
Step 4: Making the Hair
- Choose the hair color yarn.
- Cut strands of yarn of the desired length and attach them to the top of the head using a yarn needle.
- Trim the hair to your preferred length and style.
Step 5: Adding Clothing and Accessories
- Use different yarn colors to crochet clothing pieces, such as a onesie, dress, or overalls.
- Customize your baby figurine by adding small accessories like a hat, pacifier, or toy.
Step 6: Final Touches
- Weave in any loose yarn ends using a yarn needle.
- Adjust the stuffing if needed to achieve the desired shape.
Conclusion: Congratulations! You’ve successfully created an adorable amigurumi baby figurine. This delightful handmade creation is sure to bring joy to anyone who sees it. Feel free to experiment with different colors and styles to make each amigurumi baby unique. Happy crocheting!
Head
1) into the magic ring (6 sc)
2) double tight needle into each tight needle (12 sc)
3) 1 sc, 1 inc (18 sc)
4) 2 sc, 1 inc (24 sc) 5) 3 sc, 1 inc (30 sc)
6) 4 sc, 1 inc (36 sc)
7) 5 sc, 1 inc (42 sc)
8) 6 sc, 1 inc (48 sc)
9-16) 48 sc
17) 12 sc, (1 sc, 1 inc) repeat 4 times, 7 sc (nose part), (1 sc, 1 inc) Repeat 4 times, 13 sc (56) = Meanwhile 4 sc in the cheeks
i.e. 8 sc in total
we increase.
18-21) 56 sc
22) make a decrease in the level of 4 tight needles that we
increased on the cheeks
So in total 8 sc will be reduced. (48 sc)
23) 6 sc, 1 dec (42 sc)
24) 5 sc, 1 dec (36 sc)
25) 4 sc, 1 dec (30 sc) fill the inside with fiber
26) 3 sc, 1 dec (24 sc)
27) 2 sc, 1 dec (18 sc)
28) 1 sc, 1 dec (12 sc)
WIG AND HAİR
1) into the magic ring (6 sc)
2) Double sink for each tight needle (12 sc)
3) 1 sc, 1 inc (18 sc)
4) 2 sc, 1 inc (24 sc)
5) 3 sc, 1 inc (30 sc)
6) 4 sc, 1 inc (36 sc)
7) 5 sc, 1 inc (42 sc)
8) 6 sc, 1 inc (48 sc)
9-14) 48 sc
15) (15 sc, 1 inc) 3 times (51 sc)
16-17) 51 sc
18) 10 sc, 1 hdc, 1 de (inc), 12 dc, 9 sc……we cut the rope
HAİR BUN (*2)
1) into the magic ring (6 sc)
2) Double sink for each tight needle (12 sc)
3) 1 sc, 1 inc (18 sc)
4) 2 sc, 1 inc (24 sc)
5) 3 sc, 1 inc (30 sc) 6-9) 30 sc
10) (3 sc, 1 dec) 24 sc 11) (2 sc, 1 dec) 18 sc
12) (1 sc, 1 dec) 12 sc
Fill it with fiber and cut the thread. Sew on the head.
BODY
34) Draw 4 chains between the two legs and join them (36
frequent needles)
35) Increase 1 loop on each side. (38 frequent needles)
36-46) 38 sc
47) Switch to the color of the outfit. Knit only the back loops
with the blo technique (38 sc).
Continue the outfit by making color transitions as desired
between 48-50. (38 frequent needles)
51) Decrease one row under the arms. (36 frequent needles) 52-57) Decrease one row under the arms. (24 frequent
needles)
58) After the arms are filled, the arms are attached to the body with 3-4 stitches combined with the loop shift method. (24
frequent needles)
59) 1 sc, 1 sc, dec (18 sc)
60) collar frill; 2 channels Turn the body over in your hand and move in the opposite direction. (We will knit the front part of the loops in the shape of flo. Let’s make 2 chains and combine them with a loop shift. Let’s combine the whole row in this way.
61) Switch to skin color. Knit the remaining loops in the back
(18 sc)
62-64) You can cut the neck (18) rope. Sew the head with a longitudinal loop.
CLASP
Pull 23 ch and join the chain. Make 20 dc from the 3rd chain. Leaving the rope long fold it in half and sew it to the bun.
SHOE
1) 7 ch
2) Starting from the 2nd chain, circle the chain by making 6 needles at each other. (12 sc)
3) increase by 3 each from the front and back of the shoe (18
sc)
4) increase by 3 each from the front and back of the shoe (24 sc)
5) 24 sc
6) 24 sc (after knitting the sock by leaving the shoe rope long, 13 loops in the front drop the laces from the chain)
7) Switch to socks color. Decrease 6 loops from the front of the shoe (18 sc)
8) decrease 3 loops from the front of the shoe (15 sc)
9) 15 sc
10) 15 sc
11) 15 sc
12) 15 sc
13) Sock ruff: Pull 2 chains, turn the shoe in your hand and move it in the opposite direction. (In the form of flo We will knit the front part of the loops by the loop shift method)
LEGS
14) Switch to skin color, take the loops on the back of the piece we knitted as flo on the upper part of the sock and knit 15 in the form of BLO.
15) Make 14 sc, reduce 1 from the decrates
16-33) 14 frequent needles
ARMS
1) 6 sc into the magic ring (with skin color)
2) (1 sc, 1 inc (9 sc)
3-6) 9 sc
7-19) 9 sc (clothing color)
SKİRT
1) Start the 47th row of the size by looping the skirt
(We’ll go in the opposite direction.)
Make 2 dc to each loop by making 3 ch (76 dc)
2) 1 dc, 1 inc (104 dc)
3-6) 104 dc
7) Change color. Make 104 sc and cut the thread.
İlginizi Çekebilecek Diğer Konular


Henüz yorum yapılmamış.